

How To Setup GL Integration
This report lists details of the GL Journal, and creates a direct integration into a specified General Ledger/Accounting package. LinkPAY can be integrated with the following FMIS package:
· Epicor
· Sunsystems
· Accpac
· JIWA
· Oracle Financials
· JDE
· Microsoft GP
· SAP
· MYOB
· Quick Books
Below are the configuration steps:
1.
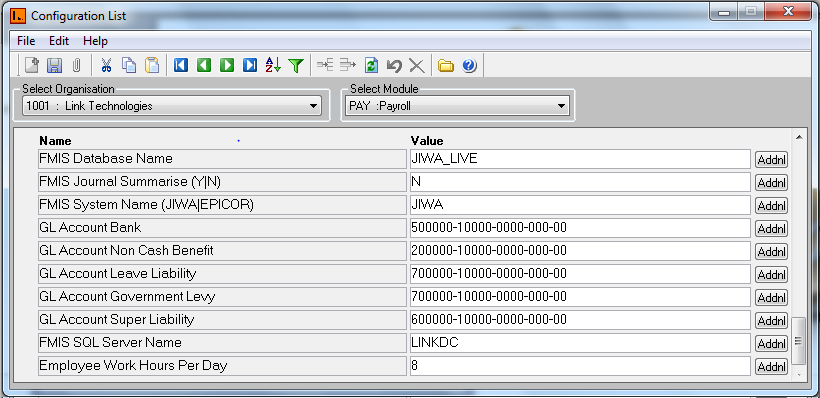
Menu 237 – Configuration List à Payroll Module
a.
FMIS Database Name – Enter FMIS Database Name
b.
FMIS Journal Summarise (Y|N) –
Y - GL will be Grouped by
Pay Code, N – GL will be created on employee level
c.
FMIS System Name (JIWA|EPICOR) – Select if the integration is with
Jiwa or EPICOR
d.
GL Account Bank – Enter the FMIS Bank Account
Code
e.
GL Account Non Cash Benefit – Enter the FMIS Bank Account
Code
f.
GL Account Leave Liability – Enter the FMIS Leave Liability
Code
g.
GL Account Government Levy – Enter the FMIS Government Levy
Code
h.
GL Account Super Liability – Enter the FMIS Super Liability
Code
i. Payroll & GL Integration (Y/N) – Enter Y, to integrate data to FMIS
2. Enter the GL Code for each pay code in Menu 311 – 1 Pay Code.
E.g. If the FMIS GL Code for AAL – Annual Leave is 600000-10000-1012-001-01, where 001 represents territory and 01 represents cost center, In pay code screen, GL Code will exclude territory and cost center.

Note : If you want system to automatically raise an invoice for a creditor, enter the creditor code in the notes for that particular pay code. E.g. FNPF, PAYE creditor account has been entered, after integration system will generate invoice with the total amount which needs to be paid to FNPF, PAYE.
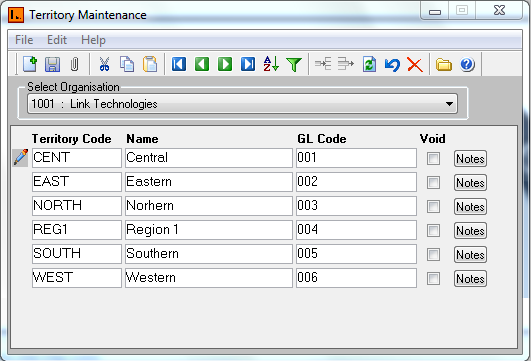
3. Enter appropriate Territory GL code in Territory Maintenance Screen (212). Leave GL code blank if Territory code is not one of the segments GL
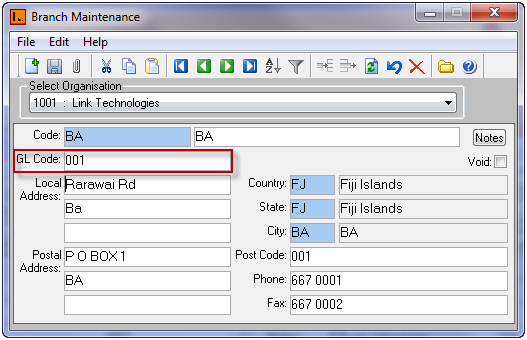
4. Enter appropriate Branch GL code in Branch Maintenance Screen (214). Leave GL code blank if Branch code is not one of the segments GL.
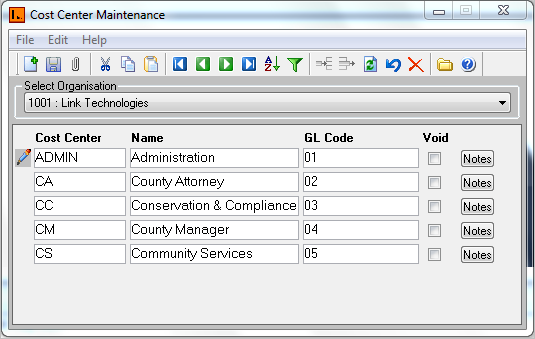
5. Enter appropriate Cost Center GL code in Cost center Maintenance Screen (213). Leave GL code blank if Cost Center code is not one of the segments GL
6. After creating the Pay, print out the GL Integration Report from Menu 332-6-1 which will show you the exact GL entries which will be created in FIMS. Select the required parameter and click on generate.
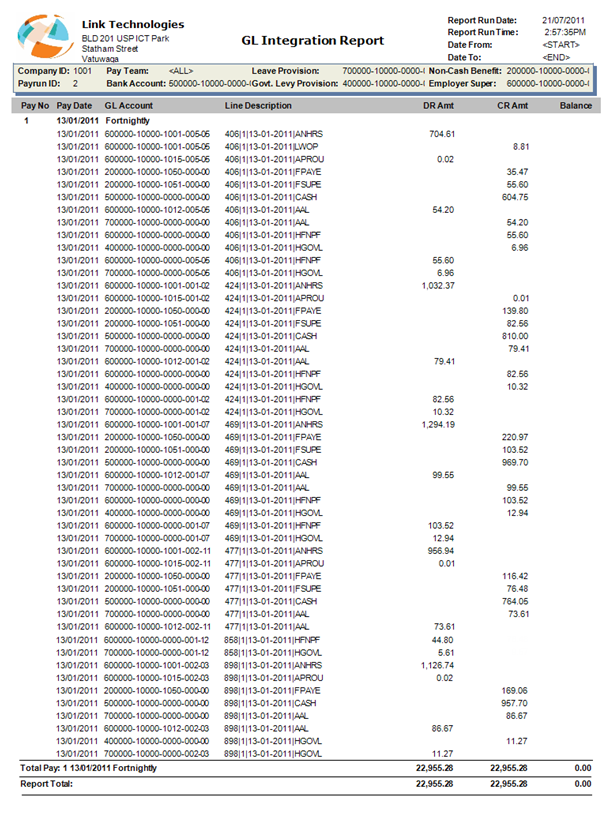
Detail for Line Description. Description is divided into four
segments:
1.
1st Segment represents the Employee
Code
2.
2nd Segment represents the Pay Run
3.
3rd Segment represents the Pay Date
4. 4th Segment represents the Pay Code
Note : GL integration only takes place when Pay is updated using 332-7 –
Update Payrun