Location stores list
of all physical locations
for Point of Sales. Locations are used for inventory management and retail
movement. Location contain below components
-
List of operating locations.
-
Location "Next Number Mask" - "Next Number Mask" is used
to define the sequence numbers of the transactions in Point
of Sales. For example,
-
Transaction 1 - TX00001
-
Transaction 1 - TX00002
-
Transaction 1 - TX00003
-
Location Bins - Inventory bins are used to store and sort
items as it allows users to know where each item is located. Bins can be
defined as rack numbers, rows or
shelve numbers.
-
Bins are used to create
stock take.
Reports
Inventory Bin
Listing
Inventory Location
Listing
Steps to create Location:
-
Click on the "Green Plus Sign". This will open the "Edit
Form".
-
Enter below details
Code - Enter a code which can be a set of alphanumeric
values to uniquely identify each location.
Name - Enter the name of the
location.
Address 1 to 5
- Enter the physical address of the
location.
Phone - Enter the phone number of the
location.
Contact Name - Enter the name of the person
to contact for any queries at
the
location.
Comment - This is an open text field, users can enter
desired
content.
Default
Tax Code -
Select the tax code from the list. Default Tax is
automatically tagged to a Product when inserting the location. Tax codes are maintained under "Linkweb
- Inventory -Tax Maintenance".
Location Mask - Location Mask is a user defined code to uniquely identify the
Location. Location Mask should be only 2 characters which is the prefix
of the next transaction ID number.
Allow Stock Update -Allow Stock Update should be ticked for a location to allow
users to update stock take, inventory adjustment, purchasing and POS
Transactions.
Default - Tick the
"Check Box", to mark it as default.Users can mark a location as default whereby if a user
creates an inventory and does not select the location, the item will be created
with the default location.
-
Void - Void records
will be "Disabled" and will not appear in any lookups . Edit the record and
"UN-tick" void to activate a record.
-
Save. Click on the "Floppy Icon".
-
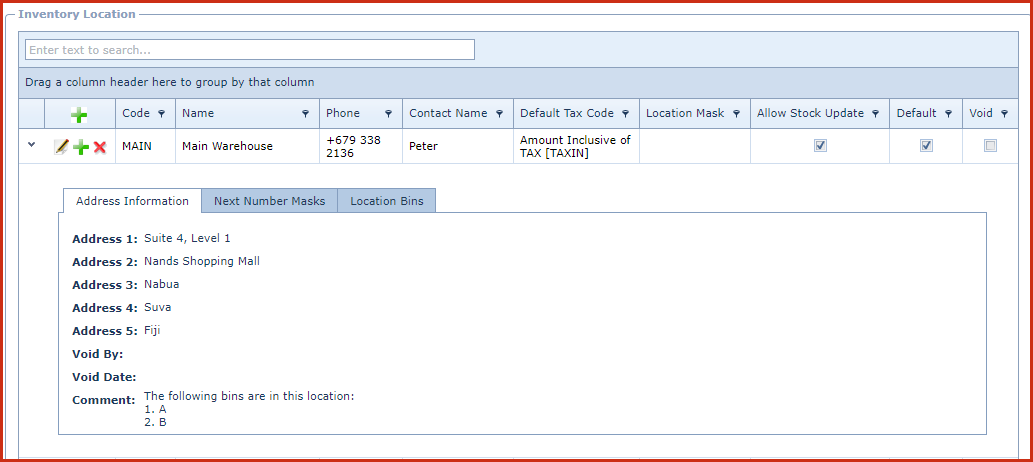
Click on the "Grey Arrow" to expand into details:
Go to the "Next Number
Masks" tab.
Click on the "Pencil Sign". This will open the "Edit
Form".
-
Enter below details:
-
Transaction Mask
- Enter the prefix of the next transaction ID number.
-
Number Mask -
Enter the serial number (to be used between the prefix and suffix) for
the next transaction ID number.
-
Next Number
- Enter the suffix part of the next transaction ID number.
-
Save. Click on the "Floppy Icon".
-
Go to the "Location
Bins"
tab.
-
Click on the "Green Plus Sign". This will open the "Edit
Form".
-
-
Bin Code - Enter a code which can be a set of
alphanumeric values to uniquely
identify
each
bin.
-
Name - Enter the detailed description of the
bin.
-
Comment - This is an open text field,
users can enter desired content.
-
Default - Tick the
"Check Box", to mark it as default.Users can mark a bin as default whereby if a user
creates an inventory and does not select the bin, the item will be created
with the default bin.
-
Void - Void records
will be "Disabled" and will not appear in any lookups . Edit the record and
"UN-tick" void to activate a record.
-
Save. Click on the "Floppy Icon".
Figure 1 : Location