The Union Maintenance is used to define unions with associated allowances. The
following functions are available:
-
Add/Edit/Delete Unions
-
Add/Edit/Delete allowances to Unions
-
Add/Edit/Delete the rate and frequency of allowances.
How
it works:
When employee
is a member of a union the following additional rules are applied when time
entry is approved from Timesheets menu.
-
For each
day's time, employee will receive additional allowances that is setup
under unions.
-
The
value of allowance is determined by the
allowance rate multiplied by number of hours worked, if the allowance frequency
is hourly.
Follow the steps below to setup an Union.Refer to Figure
1 below.
-
Navigate to Union Maintenance
under Maintenance
-
Click
on the green plus sign to add an union. Enter the
following details
-
Description - The description is the name of
the union.
-
Notes - Notes is to add an additional information about
the union.
-
Active - Tick the active box to activate the union on
the system.
Follow
the steps below to assign allowances to union. Refer to Figure
2 below.
-
Click on the grey triangle to expand the
Union Rate.
-
Click on
the green plus sign to add allowances to unions. Enter the
following details
-
Customer - Customer is the customer or company for which allowances
are paid.
-
Projects - Project is the task or assignment for which allowances
are paid.
-
Activity - Activity is the type
of allowance.
-
Notes - Notes is to add an additional information about
the union
-
Void - Tick the void box to deactivate the allowance on
the system.
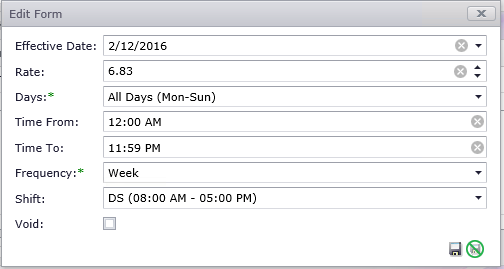
Follow the
steps below to set allowance rates. Refer to Figure 3
below.
-
Click on
the grey triangle to expand the Allowance
Rate.
-
Click on
the green plus sign to add rates to allowances. Enter the following
details
-
Effective Date - Effective date is the date from which
the allowance rate will be
valid.
-
Rate -
Rate is the allowance
rate.
-
Days -
Days is the days for which the allowance are
applicable.
-
Time
from / Time to - Time from to time to is the time range between which
the allowance will be
paid.
-
Frequency - Frequency is the basis on which allowance
will be paid this can be hourly, daily and
weekly.
-
Shift
-
Add the
shift ID where allowances are based on a specific
shift.
-
Void
- Tick
the void box to deactivate the rates on the
system.
Figure 1: Union
Setup

Figure 2: Allowance Setup
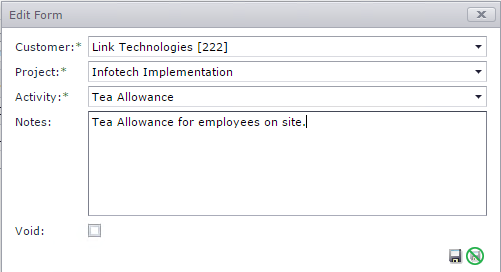
Figure 3 : Rate Assignment to Allowance