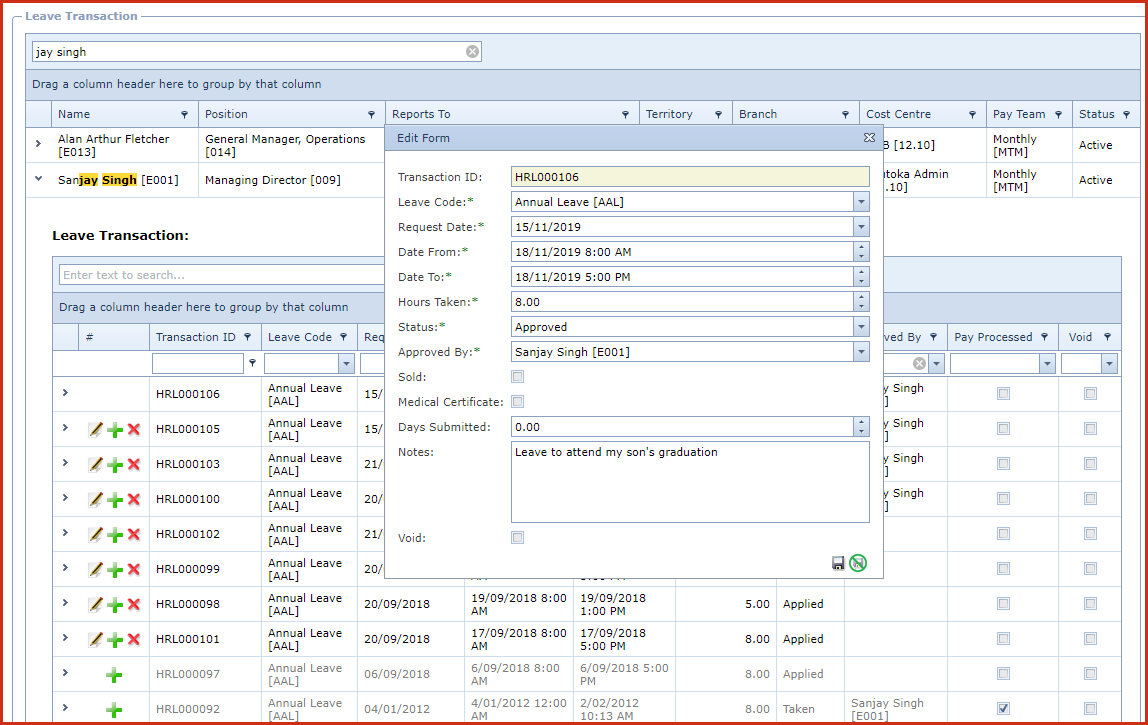
Leave Transactions shows all leave
applications for an employee. Below functionalities are available on the
page:
- Users can validate and mark leave as "Taken". Leave
with status as "Taken" flow into Payroll.
- Users can edit the leave application as "Sold". Unused leave hours can be sold to
the organisation to get a cash payment.
-
Users can apply leave on behalf of employees.
Reports
-
Leave Transaction
Steps to create or
edit leave transaction.
-
Click on the "Grey Arrow" next to the employee.
This will load all leave applications for the employee.
-
Click on the "Green Plus Sign" to add a transaction. This will open the "Edit
Form".
-
Enter
below details
-
Transaction ID - This is system generated based on the
"Next Leave Transaction Number" configured under "LinkWeb - Company
Administration - Configuration - Human Resource Management - Employee Leave".
-
Leave Code - Select the leave from the list.
-
Request
Date - Enter the date the employee submitted the
request for leave.
-
Date From - Enter the start date and
time for employee's leave.
-
Date To - Enter the end date and
time for employee's leave
-
Hours Taken - Enter the total
hours of leave.
-
Status
- Select the leave status.
-
Approved By - Select the employee from list
who has approved the leave.
-
Sold - Tick "Sold" if an employee sells
the leave to the organisation.
-
Medical Certificate - Tick this if the user is
attaching a sick sheet or medical certificate.
-
Day Submitted - Enter the number
days of is medical certificate submitted.
-
Notes - Enter the description of the leave application.
-
Void -
Void records will be "Disabled" and
will not appear in any lookups.
-
-
Click on
the "Pencil Icon" to edit a transaction.
Figure 1: Leave Transaction

 Link Technologies - LinkSOFT Documentation
  Link Technologies - LinkSOFT Documentation