Export Data is a feature to export or download data from the replication
queue. Data exported then can be manually imported.
Export feature is used when replication setup is down where the configured
servers are unable to connect to each other.
Note
-
Data is to be exported from the branch and imported
to the
Head Office Server.
-
The "POS Replication Data Export Process" should be
running for the system
to export data.
-
Folder path to export files should be set under
Configurations. Flag to set is "REPL.Export.Path".
-
The exported file naming convention is
{DestinationServer}_{DestinationDatabase}_YYYYMMDDHHMMSS.xml
-
Once a batch has been exported it cannot be deleted.
Delete is only allowed on files
that fail validation.
-
Do not change the name or contents of
the exported file.
Steps to Export Data
-
Click on the "Green Plus Sign" to
add new record.
-
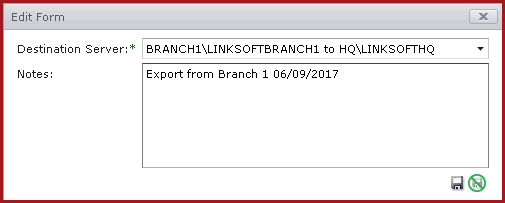
Select the Server in which data will be import.
Enter any necessary notes. Refer
to Figure 1.
-
Save. Once the details is saved a new record will be
created
with status "NEW".
-
Select the record and click on the "Export" button
at the bottom. Click on the check box to select the record. Refer
to Figure 2.
-
Once data is exported, the record will be
highlighted in red. The status will be updated as "EXPORTED". Users will be
able to access the exported files in
the defined path.
-
Users can mark the status as "COMPLETED" after the
data has been successfully imported.
Figure 1: New Export

Figure 2: Data Export

 Link Technologies - LinkSOFT Documentation
  Link Technologies - LinkSOFT Documentation
