In
order to complete a cash transaction, the following steps needs to be
followed:
|
| |
|
1 |
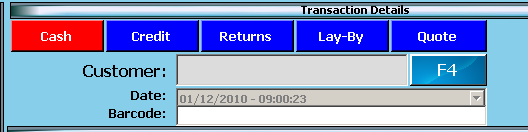
Select the Cash Option button:
|
|
2 |
Items can be entered in the system by either: Using the scanner, the user can scan the items. The
details (Description of Item, Quantity, Unit Price, Tax and Total) will be
displayed on the screen. All this information is loaded from the
preconfigured Inventory Master File. The user
can enter the barcode of the item in the Barcode Field and press enter.
This will again display the details (Description of Item, Quantity, Unit
Price, Tax and Total) on the screen.
Selecting
the items assigned as Fast Keys. |
|
3 |
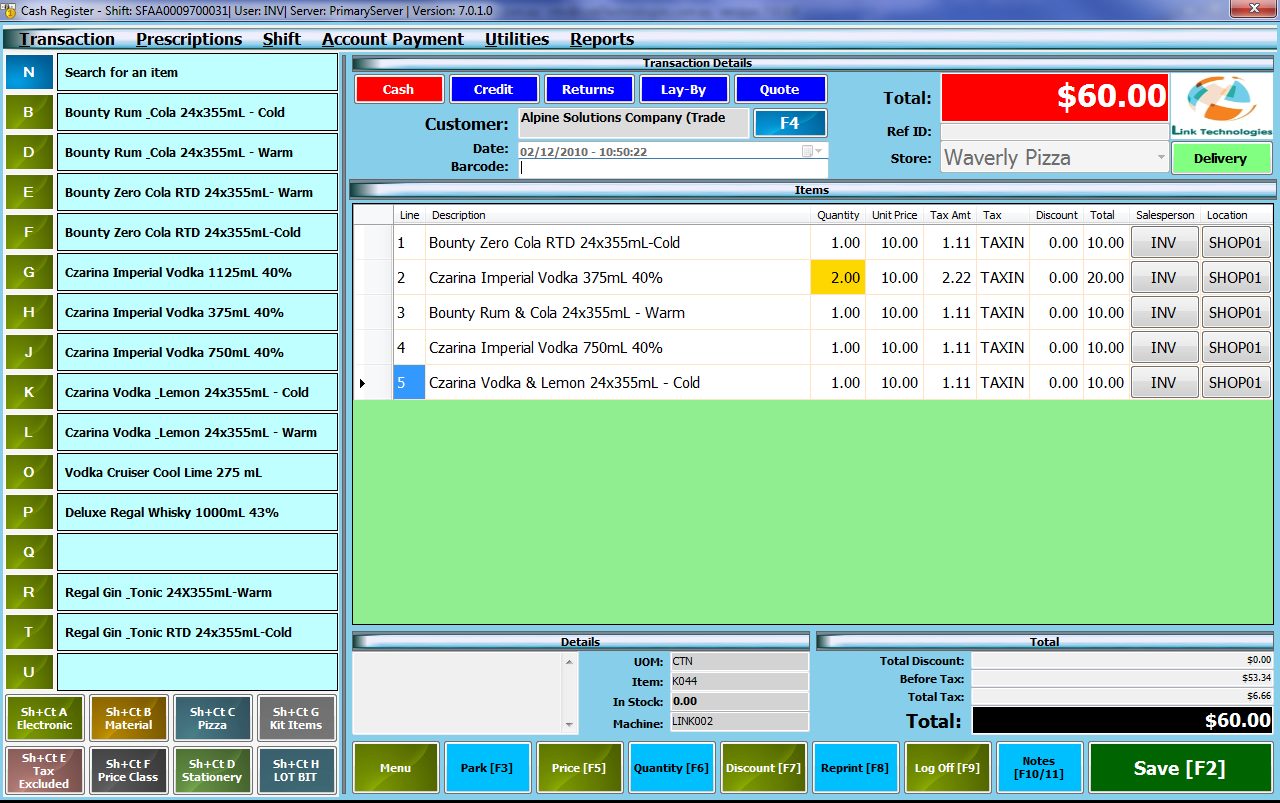
Once
the items are scanned or entered manually using barcodes or fast keys, the
system will calculate the total and display gross amount, tax amount and
the total amount of the cash sale on the main screen as shown
below:
At this stage, the user can choose from one of the
following options: Park the Transaction – This situation would arise when the customer does not have sufficient
funds for payment, or the customer has forgotten their wallet in the
car, or has simply decided that they do not wish to pay for the item.
The cashier can park the transaction for later retrieval and processing
(including voiding). Note: Only transactions that have NO RECEIPT can be
voided.
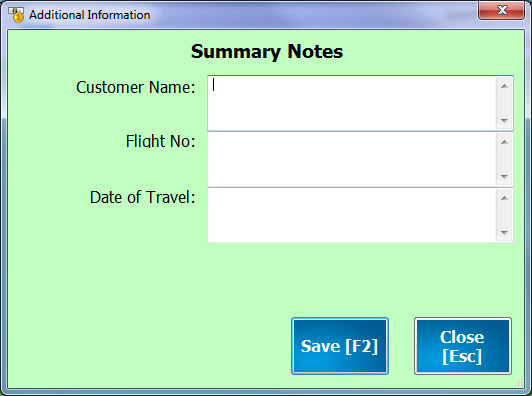
When Park is selected, the following screen loads for the cashier to
enter additional notes for parking the transaction. The fields and field
name within this screen are configurable and can be setup in the Configuration
menu (Menu ID: 237) in Backoffice:
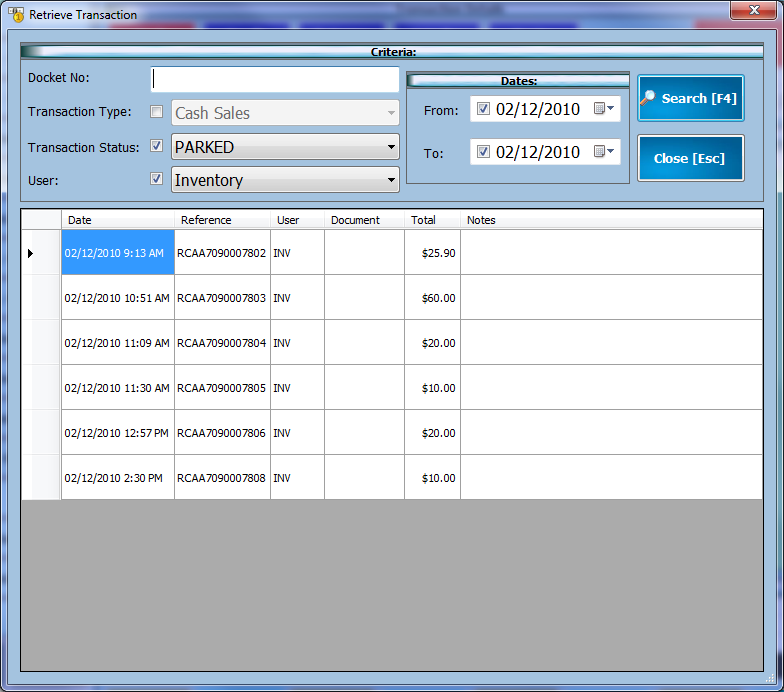
When
the Retrieve Transaction screen is loaded to load the parked transaction,
the list of transactions will display the notes which were entered when
the transaction was parked:
Park Transaction can also be used for delivery, and
to pick up customers. The user can select the customer in the Customer Field,
select the items ordered by the customer, and Park the transaction. When
the customer comes to pick up the ordered items, the user can load the
Parked Transaction and process the order. Depending on the configuration setup, the system will
print a Parking Slip when transactions are parked. Apply Bulk Discounts – Each user is configured for
discount limits. If the user needs to give discounts, now is the
time. Complete the Transaction – This will confirm
the transaction in the system and print the receipt (depending on the
Receipt Print Threshold set In the Configuration Maintenance). At this stage,
this transaction cannot be voided. If you need to reverse this transaction,
you need to perform a Return. |
|
4 |
Click
on save button or press [F2]. This will take the user to the Payment Entry
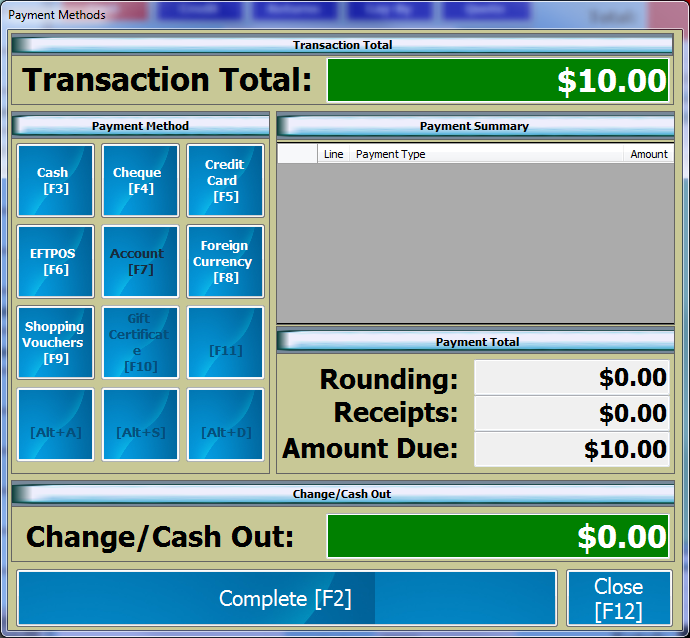
Screen. The Payment Entry Screen is displayed below:
The Payment Entry Screen is designed to take multiple
payments. Each payment taken can consist of different details. This is
setup in the Payment Configuration Options and is set by your system
administrator. |
|
5 |
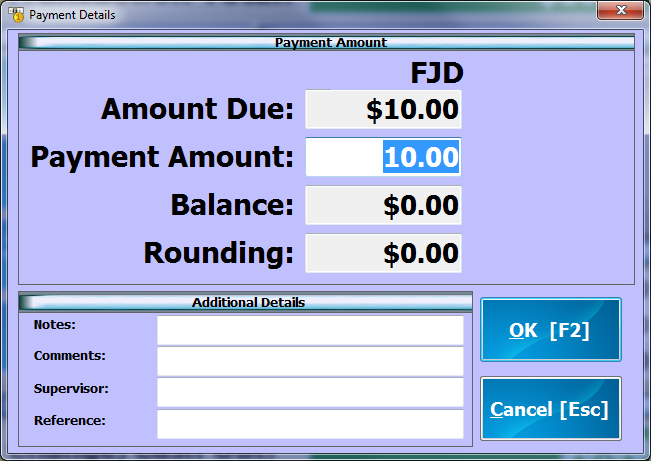
For
cash payments, select the cash button, or press the shortcut key [F3] in order
to enter the payment details.
|
|
6 |
Enter
the amount in the Payment Amount Field. By default, the total outstanding
amount will be displayed. |
|
7 |
Save the details by either clicking
on save button or using [F2].
|
|
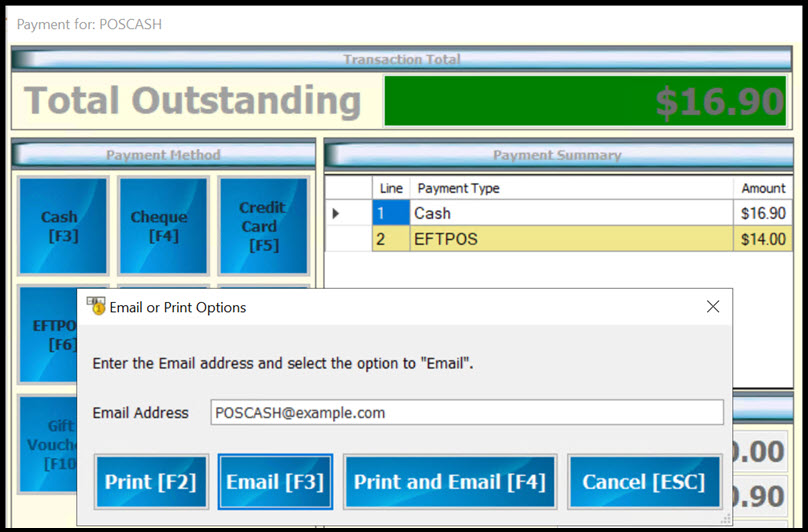
8 |
The system will display payment methods screen again
showing payment summary and payment totals – receipts and amount due. The
amount due will be displayed in change/cash out field. In order to
complete the transactions select the complete button or use the shortcut key
[F2]. The total amount in change, if any, will be displayed
on the screen. The receipt will be printed, and the cash register will open at
this stage. Once
change is given, the cash drawer should be closed for the next transaction
to process. The system will update the records and save the last
transaction from the screen, in order for the user to proceed with the next
sale transaction.
|